Banana Pest and Disease Management in the Tropical Pacific: A guidebook for banana growers
Chapter IX: Macropropagation of Banana
Introduction
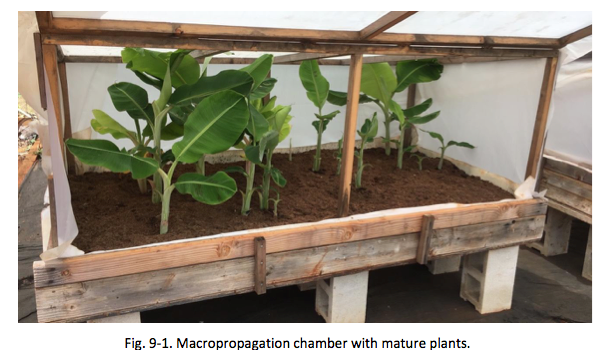
Although field obtained banana keiki (sucker) are preferred by growers as planting materials, they often have a higher risk of harboring disease and insect pests that can lead to decreases in productivity. Thus, demand for high quality disease- and insect-free planting material is increasing. Tissue culture (micro-propagation) can be a viable alternative to planting keiki but require sterile laboratories and highly trained technicians to avoid contamination and guarantee success.Many labs that provide tissue culture services may be expensive and/or require large quantities be purchased making it impractical. To address these challenges, macro-propagation has been introduced as an alternative. Macro-propagation can be done with little capitol cost and minimal skill. This chapter describes how to construct a macro-propagation house and the steps required to prepare the planting material and harvest clean banana plantlets.
Construction of Macropropagation Chamber
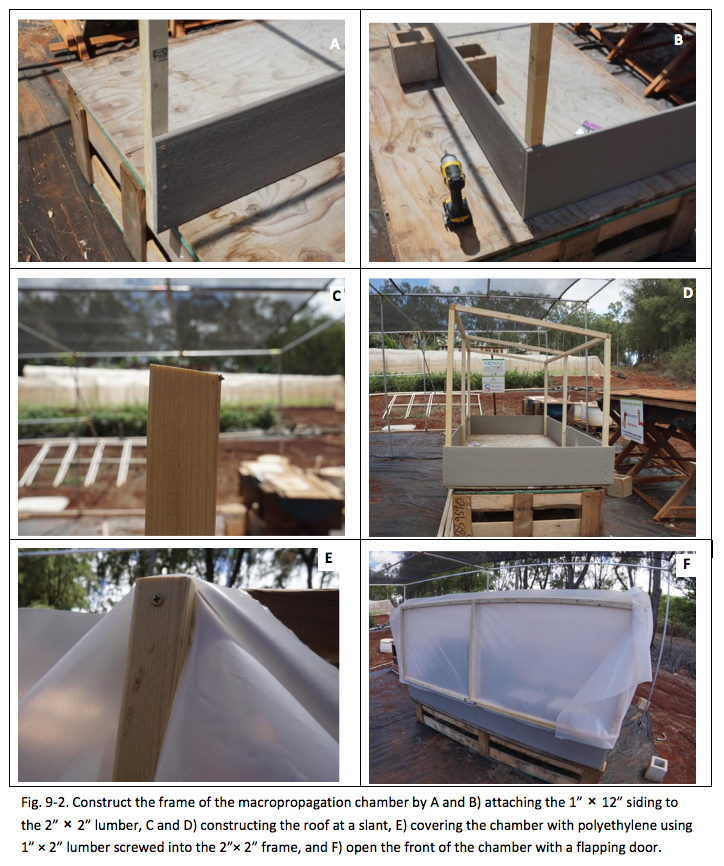
- Determine the size of the propagation chamber desired.A convenient size for the chamber is 4 ft wide × 8 ft long × 4 ft tall but smaller units can be constructed.
- Cut plywood to the desired area and elevate plywood off the ground using eight CMU’s.
- Build frame of the structure using 2” × 2” lumber and 1” × 12” lumber shown in Fig. 9-1. Ensure that the rib spacing on the roof is 2 feet or less. Uprights should be cut to allow the roof to slope (Fig. 9-1 C, D).
- Construct a door using 2” × 2” lumber and attach using door hinges to one of the cross bars.
- Line the inside of the bed and the outside of the structure with polyethylene plastic and secure using staples 1” × 2” lumber and screws (Fig. 9-3).
-
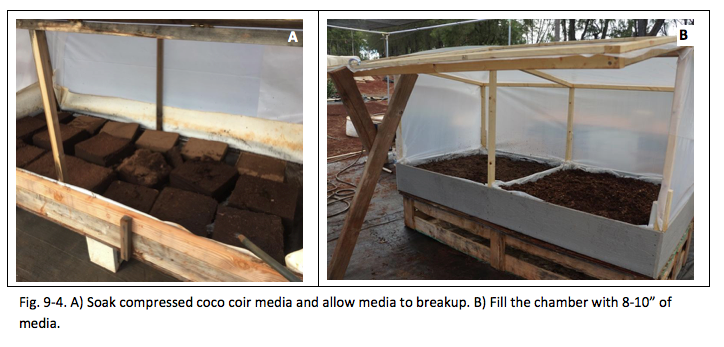
Moisten coconut coir and fill in lined
structure with six to eight inches of media.
Preparing the Planting Material
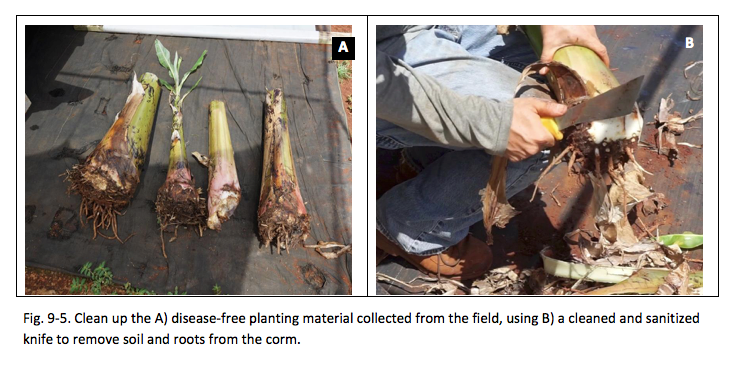
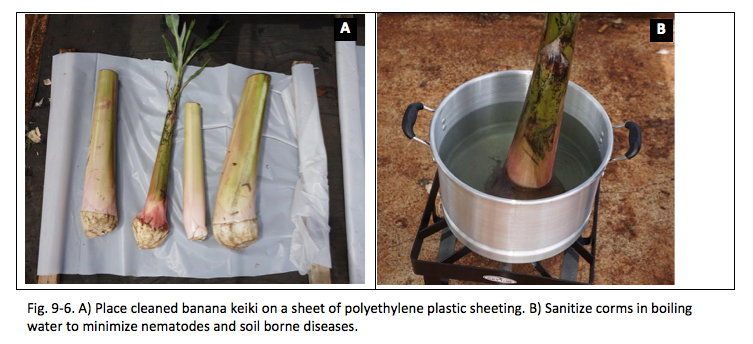
- Select clean and healthy banana suckers from desired mats.Test plant material to ensure they are banana bunchy top virus free. Using a knife remove all soil and roots from the corm of selected disease-free suckers.
- Boil water in a large pot. When water has reached a rolling boil, submerge cleaned banana corms into boiling water for 30 seconds (Fig. 9-6). Remove treated corms and place on clean polyethylene plastic sheeting. This step will help to sanitize corms and reduce the chance of spreading nematodes and soil borne diseases.
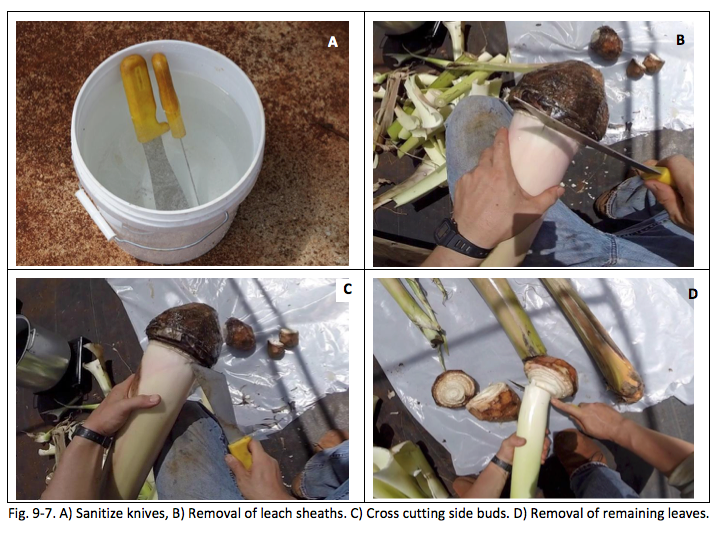
- Wash and then sanitize knife and remove each leaf sheaths at the base. After each sheath is removed, use the knife to cross cut each bud. After majority of the leaf sheaths have been removed cut the remaining leaf sheath at the base.
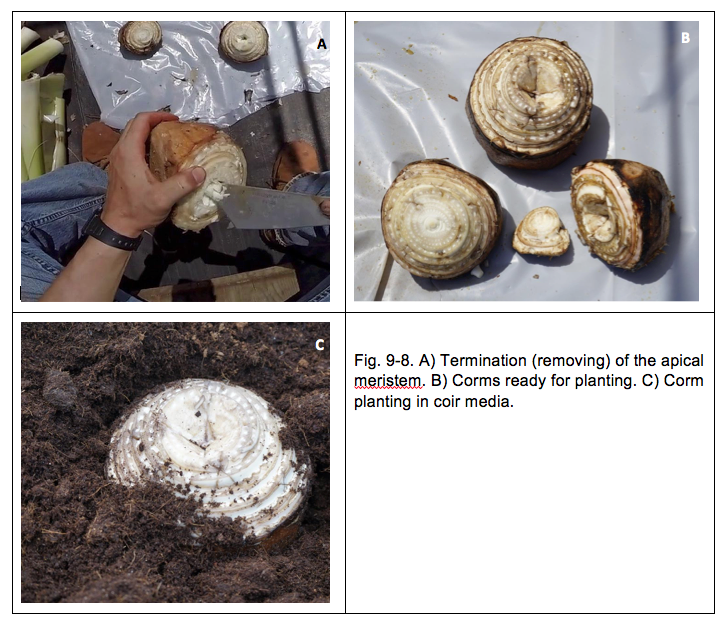
- After removing all the leaf sheaths, use the knife to terminate the apical meristem (main shoot) (Fig. 9-8).
- Place the prepared corm into the growth chamber and burry with coconut coir.
Managing Shoots and Harvesting Propagules
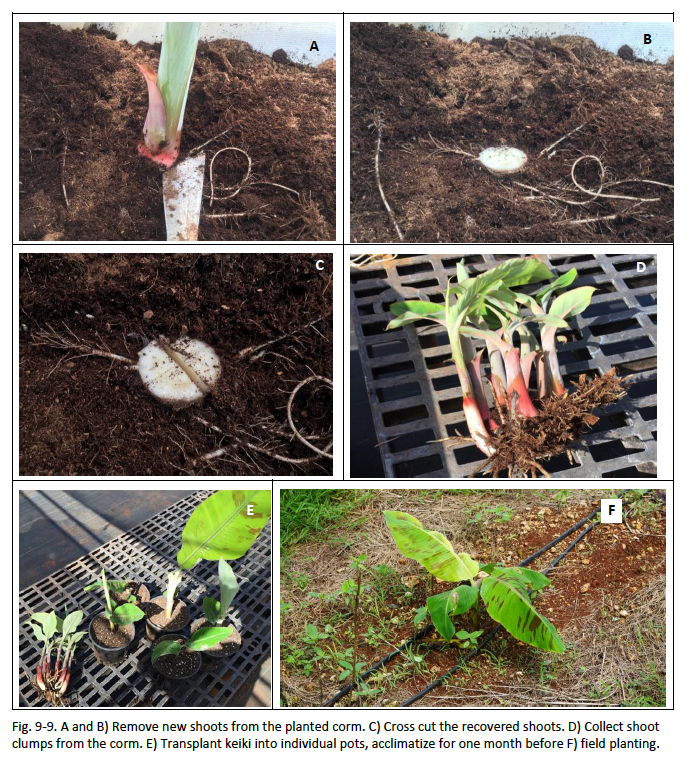
- As single shoots emerge from the planted corm use a sanitized knife to cut the shoots off at the base and then cross cut the base to stimulate more shoot division (Fig. 9.9 A-C).
- When multiple shoots emerge, remove using a sanitized knife and then plant into one gallon pots filled with potting media. Allow shoots to acclimatize and develop a strong root system for at least one month.Fertilize plants weekly using a complete fertilizer (Fig. 9.9 D).
- Once plants have hardened off plant out into the field (Fig. 9.9 E, F).
References
Baiyeri, K.P., and S.C. Aba. Almeida. 2007. A Review of Protocols for Macropropagation in Musa Species. Fruit, Vegetables and Cereal Sci. and BioTech. 1(2): 110–115.
Njukwe, E., E. Ouma, P.J.A. van Asten, P. Muchunguzi, and D. Amah. 2013. Challenges and opportunities for macropropagation technology for Musa spp. among smallholder farmers and small- and medium-scale enterprises. Banana Systems in the Humid Highlands of Sub-Saharan Africa. 8: 65-71.